Blog
 No comment
For the last few weeks, I have been playing with an app called Dreamscope, which is a way of applying filters to existing images to create some painterly effects. There is little control on the app; in most cases, it works, or it doesn’t. And whether it does or not is obvious pretty quickly.
Here’s an example. Yesterday morning, my wife Donna took an image of some April irises popping up beside our front porch. Very nice. Beside them is an image filtered through Dreamscope to turn it into a faux-painting.


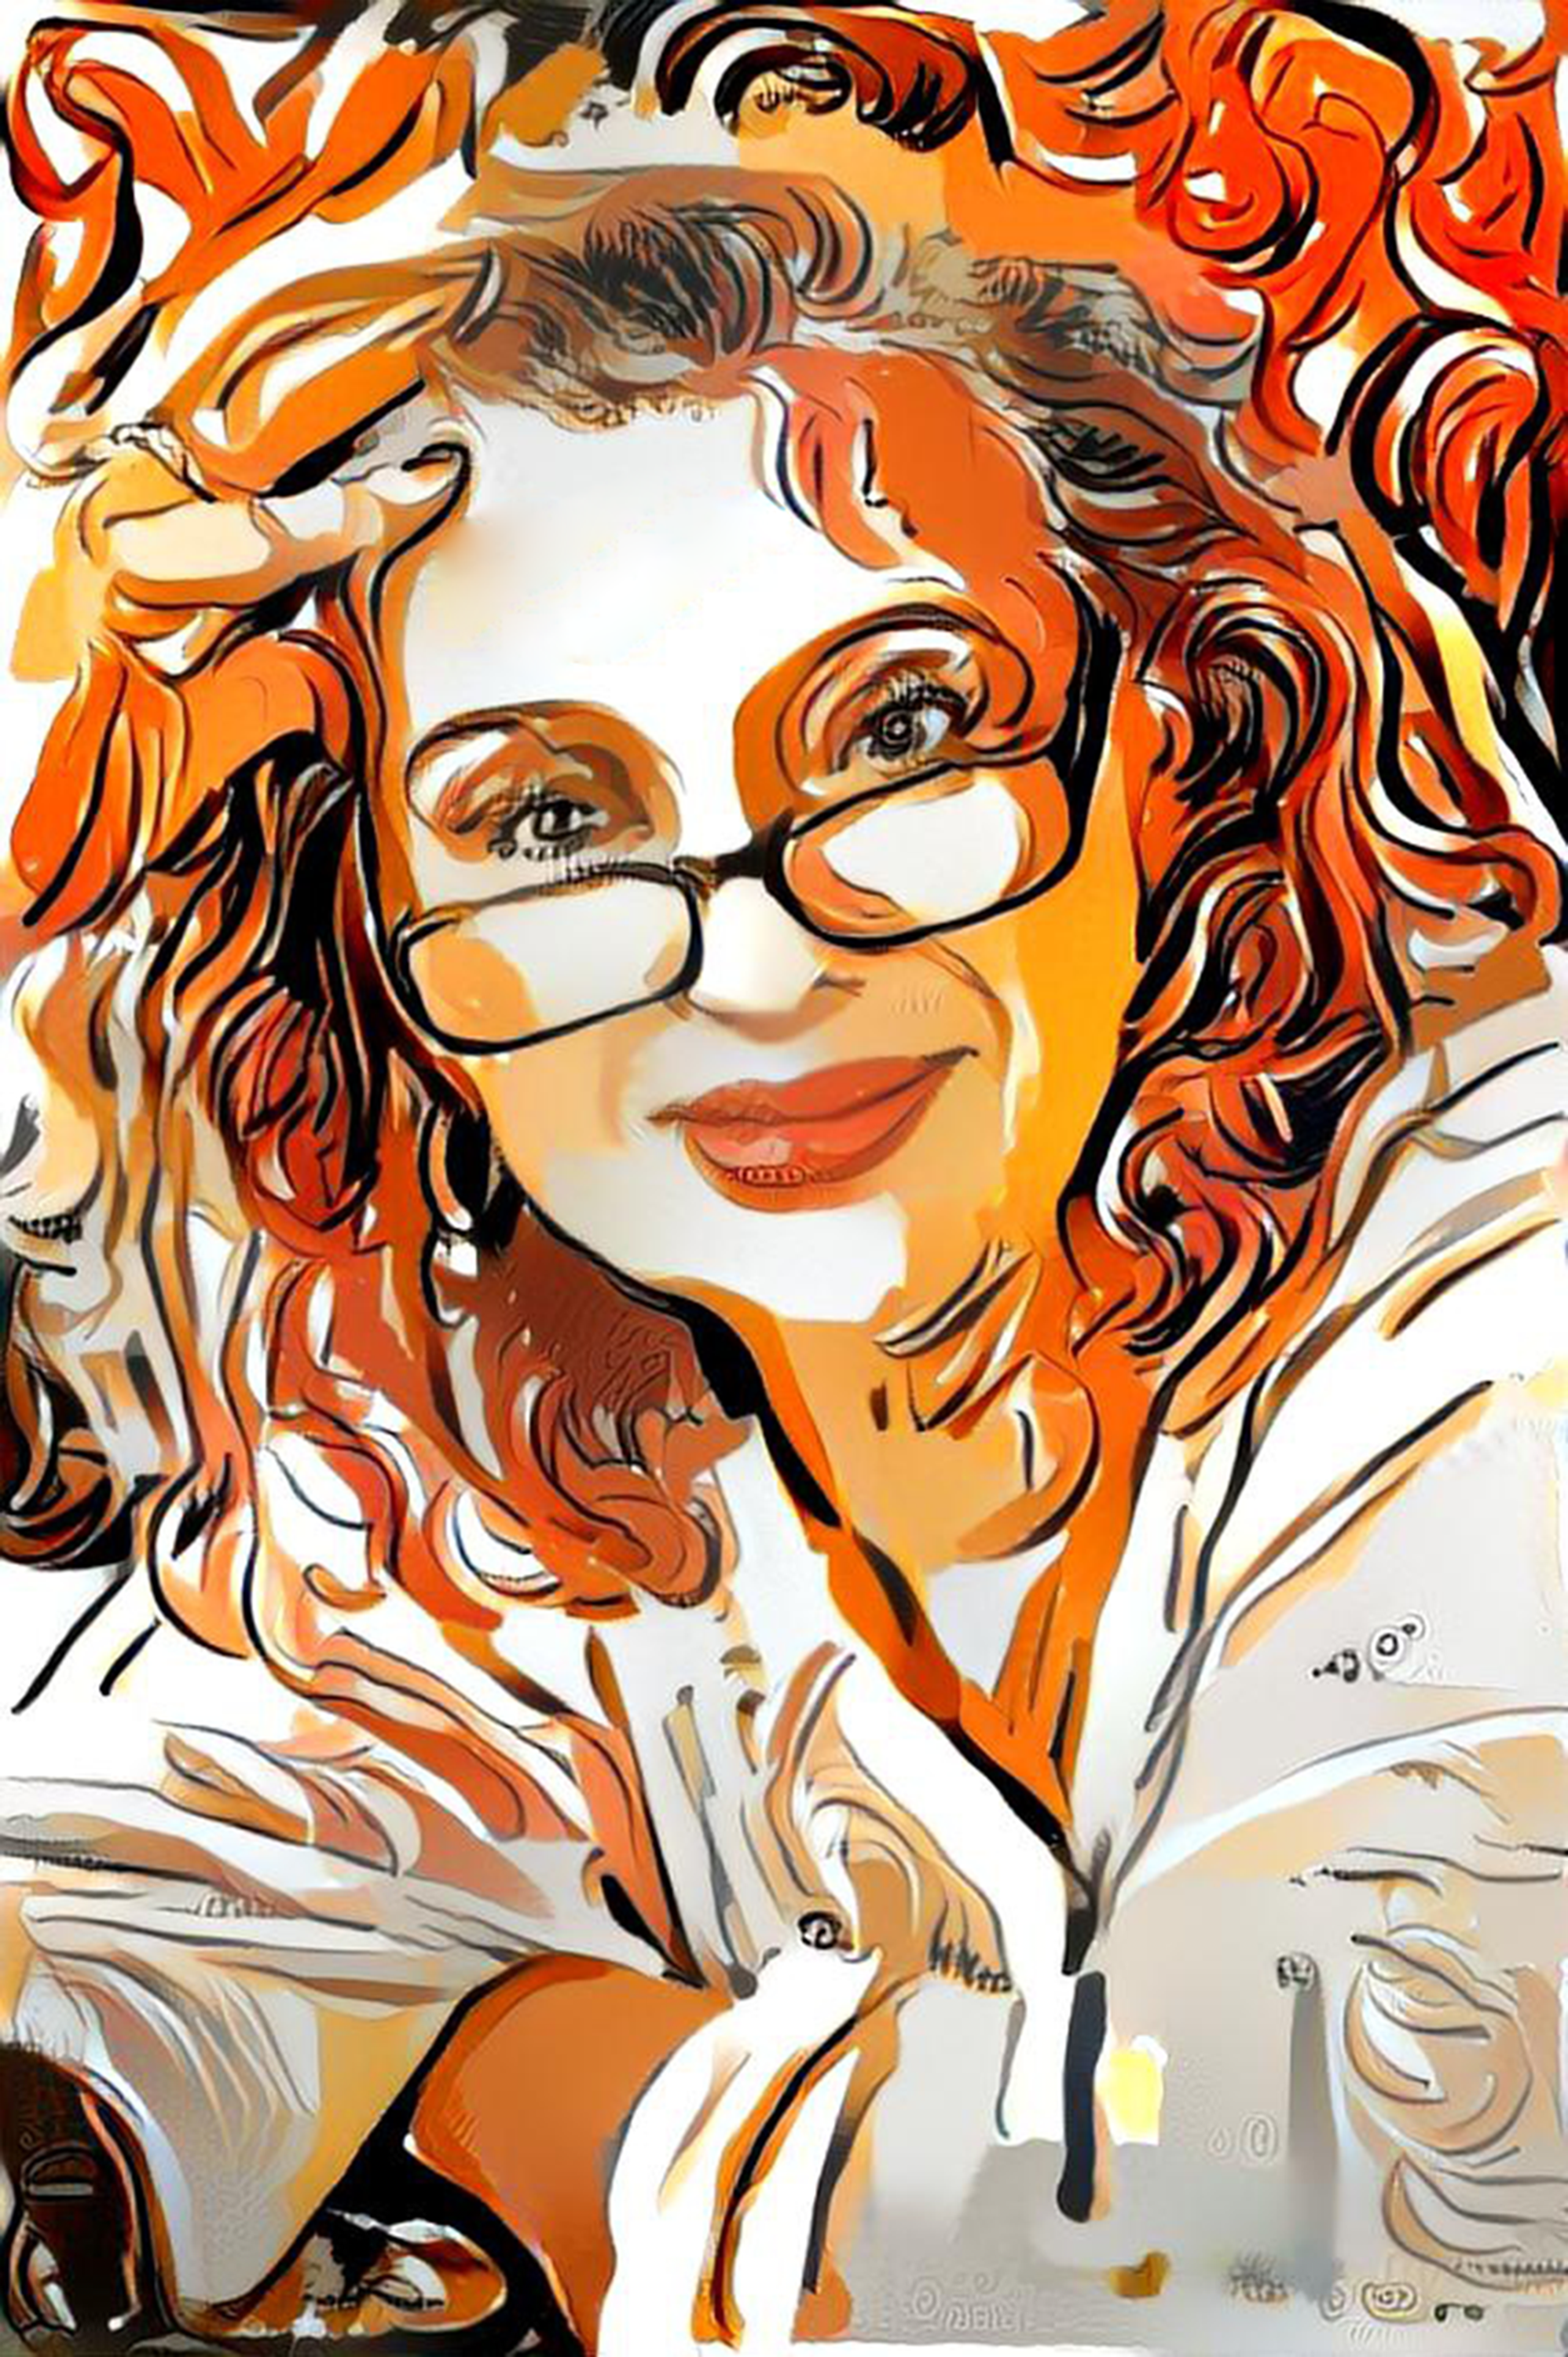
I then experimented with a photo of my wife. The first is a photo I took of her last summer, at an occasion when the light was right. And the next several are filtered via Dreamscope, to pretty good effect.


So this is fun, and effectoive in some cases, and puts the capacity of an IPhone to good use. But what if you want more control?
I assumed you could do this if you created the file in Dreamscope, imported it along with your original file in Photoshop, then treated that file as a layer. If you’ve ever done much editing with textures, you probably have a good idea where this is going.
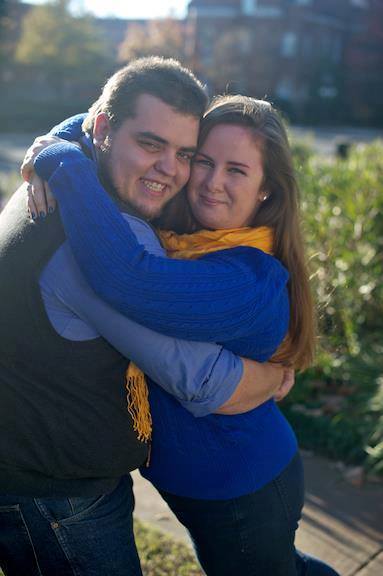
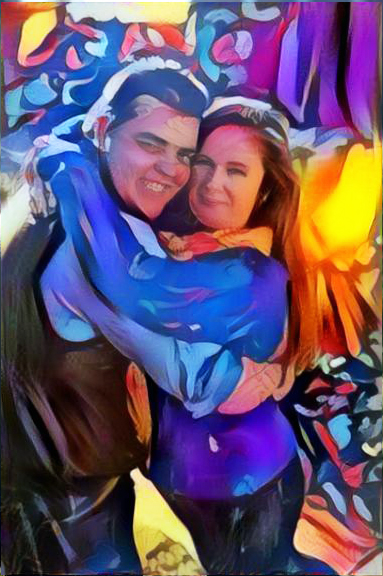
Several years ago I took some photos of Stephen and Angela. Angela posted this one for his birthday today. I downloaded it, and opened in Photoshop.
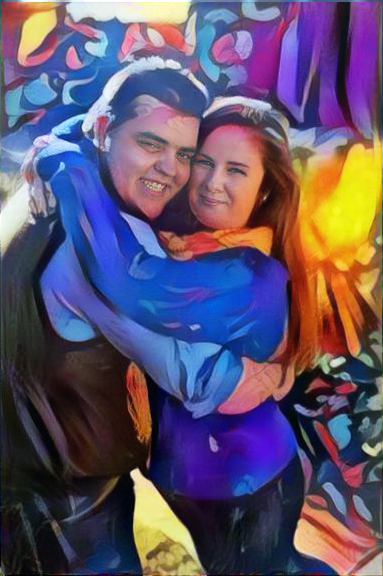
Then I also uploaded the image to the Dreamscope app, where you can select from a number of filters. For this one I used the “garden” filter. Dreamscope rendered the effect, then I imported that file into Photoshop, rasterized it and treated it as another layer. Changed the opacity of the layer, did a little erasure around the faces, and this is the result.
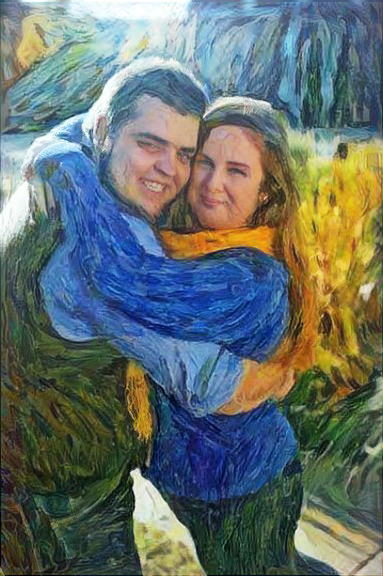
I always make a second copy and turn that layer off, in case my editing is too heavy-handed or destructive. I can then just throw the layer away, create new one from the saved original, and try again.
Happy birthday, Stephen! Here’s how to add more dimension to existing photos.
Notice: get_the_author_email is deprecated since version 2.8.0! Use get_the_author_meta('email') instead. in /home/bws0w3r3evhr/public_html/wp-includes/functions.php on line 4340
Notice: the_author_description is deprecated since version 2.8.0! Use the_author_meta('description') instead. in /home/bws0w3r3evhr/public_html/wp-includes/functions.php on line 4340
David Ferraro first picked up a camera in 1958 when his parents gave him a Kodak Brownie for his eighth birthday. Thus began a lifelong passion for photography and image making. He began his media career as a news photographer, and transitioned into video in the seventies. Over the last forty years, he built a career creating images and telling stories. David learned early on that a producer-director is first and foremost an interpreter, telling a story through ideas and images. That what Impact Photography, one of the premier wedding photographers in Hampton Roads, does: tells your story through carefully crafted images. Let David and Impact Photography interpret your event, create your portrait, and tell your story.